Someone recently asked me how carving wax starts out. First of all, there are a number of varieties to choose from. Your specific application and personal preferences will naturally influence which type you choose. Some artists prefer to add material to their model as they create it. I, however, almost always work subtractively. Carving wax is primarily purchased in thick sheets, tubes designed for use with a wax lathe, or one large block. I think most jewelry artisans would agree the sheets are by far the most useful. The tubes are also wonderful as they do save quite a bit of time for designs that require turning. Although blocks are certainly the cheapest, they are cumbersome and only necessary for few largely sculptural projects.
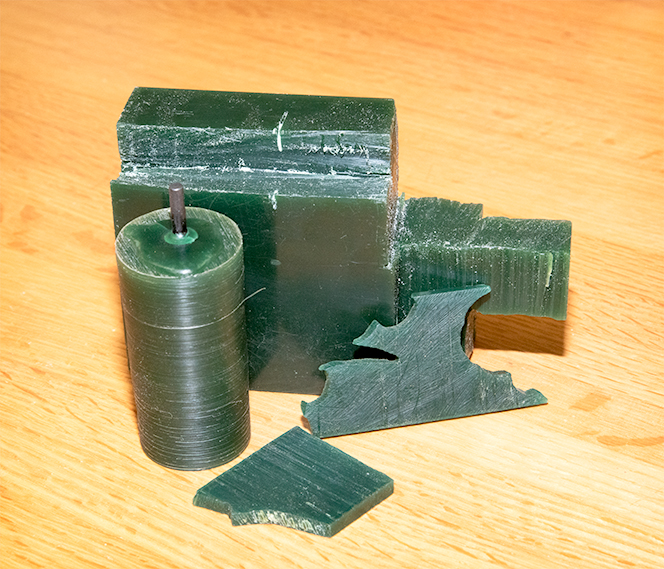
The waxes used for model work are drastically different than injection waxes for production pieces. Injection waxes are all quite soft and pliable; they are designed with enough flexibility to be pulled from a mold without cracking. Anyone who has ever attempted to carve injection wax has found themselves with a miserable mess. It can be done, of course, but with a degree of frustration as injection wax is a bit sticky to work with. Not only will this impede carving but it will also clog files fast.
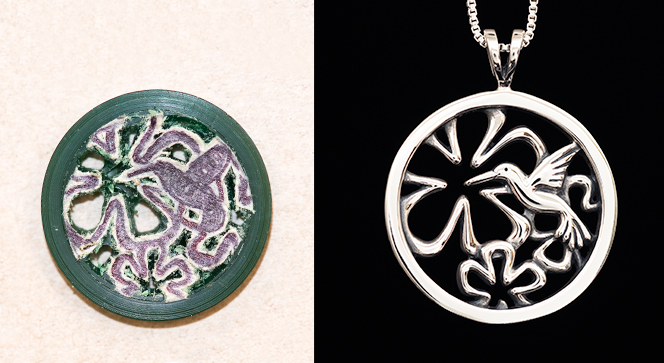
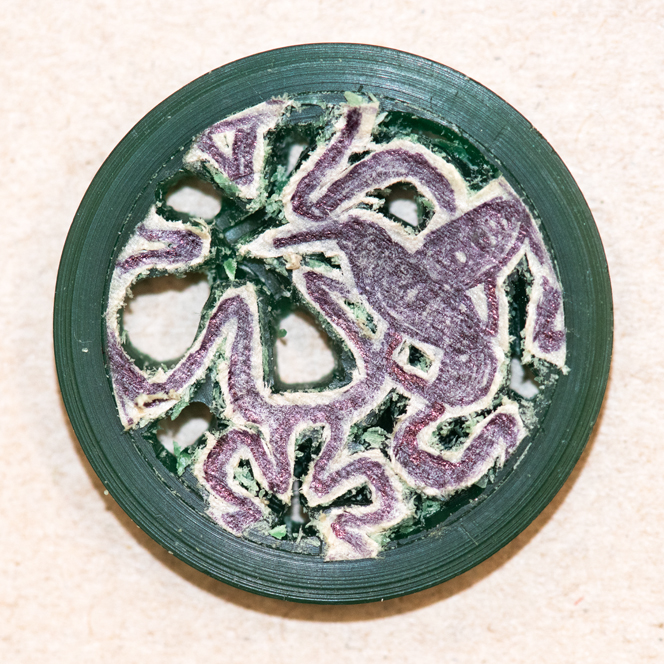
There are a number of consistencies and types of wax available beyond what I proceed to describe in this post. For the moment my focus is on what I utilize for my craft. I prefer the hardest variety of wax, the dark green, as it holds detail best. It will also break before it will bend. This brittle characteristic does leave it quite prone to cracking and small appendages can be easily snapped off if too much pressure is applied. This propensity to snap does have some major advantages though. Softer waxes are much more likely to bend gradually with the heat of your hand over the duration of a long project. Repairing a warped carving is infinitely more difficult than wax welding one broken bit and recarving that area only.
In laying out a design for a flat piece, or one relatively so, I begin by carving the frame (if one exists). Next, I affix a piece of masking tape with a rough sketch of the design to help me create the initial layout. Masking tape works wonderfully for this because it can be easily carved through. Sharpies are also helpful to sketch directly onto the wax. I use them often as the design takes shape. However, carving wax somehow clogs sharpies quickly which is why I prefer to begin with tape.
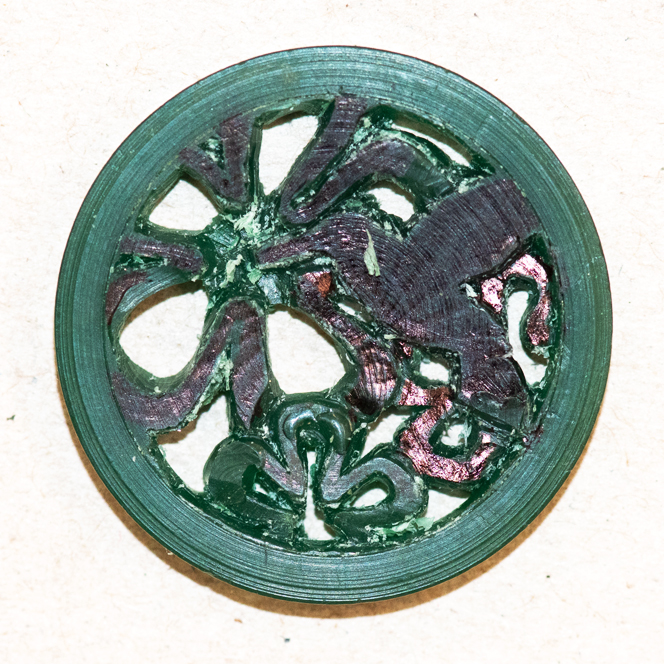
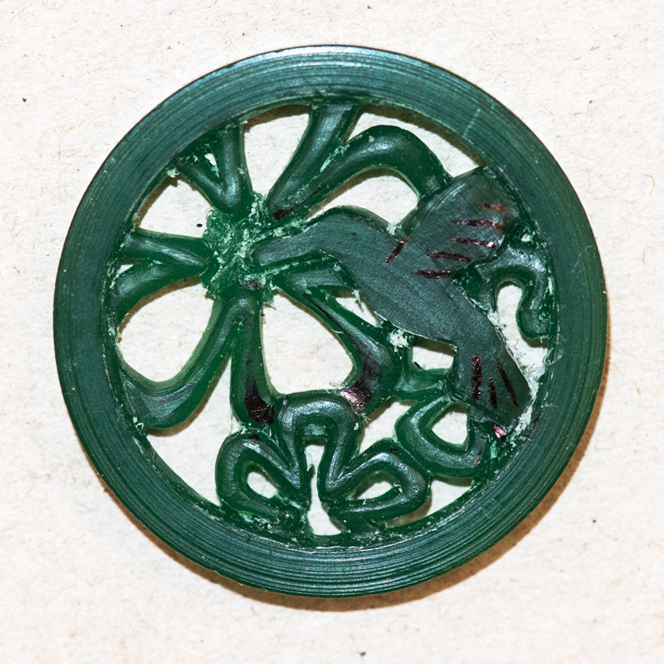
Naturally the first step is to carve out the rough shape of the design. Once the proportions are correct or close its simply a matter of refining by degree. The carving process is long and arduous, it would be unreasonable to expect a carving to look finished after a few hours. A piece gradually gains its final form with each progressive pass of carving. Flaws, file marks or air bubbles must be corrected as greater degrees of refinement are established. I will often alter designs as they take shape. Carving, like many artistic processes is quite intuitive. It is a visual and physical exploration of form. I frequently alter the proportions of the various elements in my designs to either correct anatomy or lend a more graceful flow.
To protect the structural integrity of the design and compensate for the fragile nature of carving wax I leave supports in delicate spots on pieces that have open space combined with fine detail. These supports will remain until the very end of the project. Sharp tools are also essential. With no working knowledge of wax carving it may seem like sharp tools would be easiest to craft with. However, this is not the case. Sharp tools are prone to skip and catch while a slightly dull tool will always burnish. All budding jewelers love partially dull carving tools until they begin to work on more intricate designs that would be broken by the pressure required to carve with a dull blade.
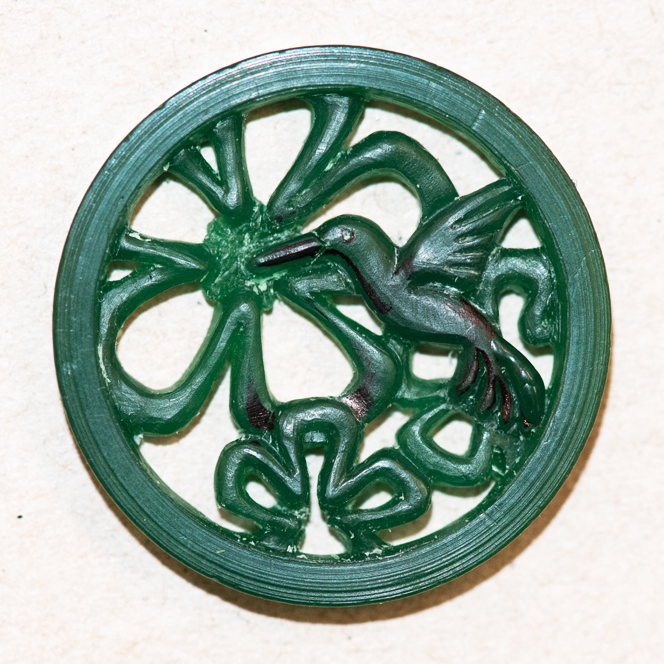
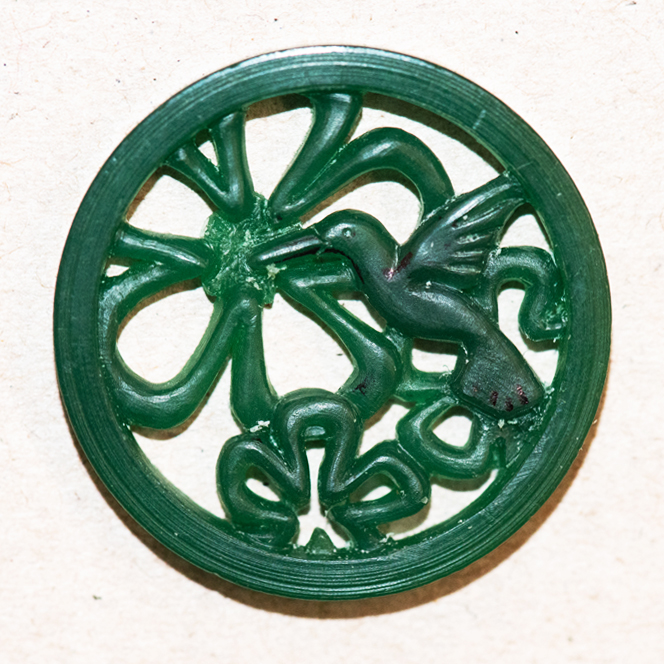
Finishing is by far the most intensive and most time consuming part of the processes. Once the overall carving is achieved, it must be meticulously burnished to absolute perfection! As the form becomes more and more refined an ever softer and lighter touch is required to control sharp instruments and leave a flawless finish. Slow deliberate movements are key. Due to the small nature of jewelry items a slight slip of the hand can easily destroy an entire section of a design. Anything can be repaired, however, wax welding over a mistake can lead to a lengthy correction. I spend much of the carving process under 3X magnification which is critical to such fine work.
There are several additional steps in the process that I could elaborate on and plan to in upcoming posts. For example, design layout is absolutely critical and proper time must be spent in establishing a good foundation for a carving. I have had a few false starts when I rushed this step and realized my carving would end up either too large or too small. The only thing to do at that point is to start over. Stay tuned for my next post describing my process for design layout.